Control app designed for big shops that they control receipts that are exiting from the store. You can add controls and install control app to handle this scenario.
01.
Go to settings
First, open drawer menu and go to setting in Alces Merchant application.
02.
Control Accounts
Click on "Control Accounts".
03.
Control Accounts section
In this section you can manage you Control Accounts. You can add or remove them.
For add Control Account click on "Generate invite Code".
04.
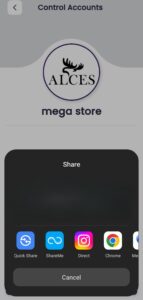
Share the code with your control user
You can send the code in the way that fits for you.
05.
Open Alces Control App
Install Alces Control on the device you need and open it.
06.
Login with Control Account Phone Number
In this section Control should login with a phone number. It is up to the merchant owner to login with organization numbers or control personal number.
07.
Complete Control Profile
In next step control needs to complete their profile. Recommendation: you can use numbers for name to get better report.
08.
Enter the code
In this step Control should enter the code that received from Merchant. (the code that generated in step4).
09.
Done!
Now Control app is ready. click on "Explore".
10.
Dashboard of the Control App
You can see invoices that are pending or rejected or even accepted.
11.
All set up.
Now Control is ready to scan QR code under each receipts from Alces Client App and accept or reject them.
Key Features That Distinguish Alces.
QuickBooks-Compatible Reporting
integrates seamlessly with QuickBooks, making it a powerful tool for businesses that need accurate, professional-grade financial reports.
Real-Time Merchant-Client Communication
bridges the gap between customers and businesses, enabling real-time communication for issue resolution, purchase tracking.
Advanced Expense Categorization
Alces simplifies financial tracking by allowing users to separate and manage expenses efficiently. This feature is perfect for individuals and businesses looking to streamline their budgeting and reporting.
Alces is an innovative platform that simplifies receipt management, expense tracking, and financial organization for both individuals and businesses. By digitizing receipts through barcode scanning, manual input, or AI-powered recognition, Alces helps users stay on top of their personal and business expenses effortlessly.